
One of the subjects I seem to be dealing a lot with recently is invitation codes – so much so that this was the featured topic for this month’s Portals Community Call. During that call I promised to share a small bit of CSS that would hide the “I have an existing account” checkbox on the Redeem Invitation page, so I’ll do that in this post, as well as give a bit of background as to what the checkbox is used for, and why it most cases you probably don’t need it.
When redeeming an invitation code, users end up on the https://yourportal.powerapps.com/Register page, which looks something like:
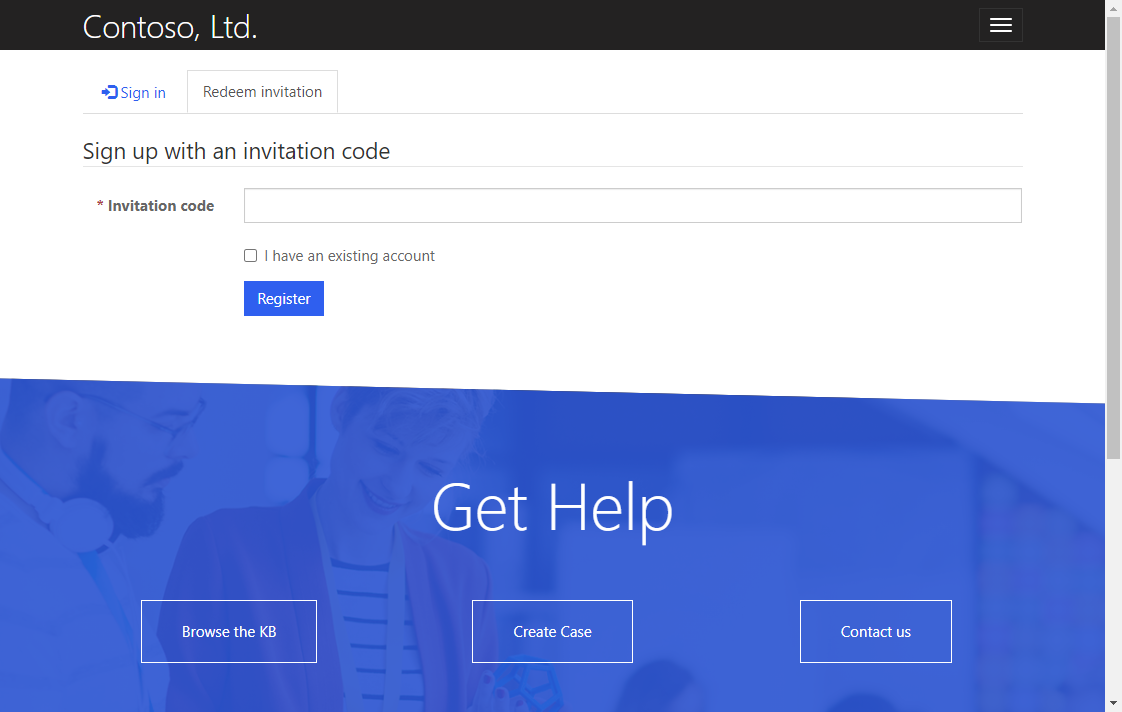
Right above the Register button you see the I have an existing account checkbox. I’ve found that most users find this to be a confusing checkbox.
You might be asking yourself why someone would redeem an invitation code if they already have an existing account. This is a fair question – in my experience invitation codes are almost exclusively used to allow existing contacts to be joined with login credentials, which means the user should leave the I have an existing account checkbox unchecked.
However, there are other uses for invitation codes – they can be used to give users additional web roles, or you can use them to run classic workflows when the invitation code is redeemed. In those cases, invitation codes might be redeemed by users that can already login to the portal.
In short, the I have an existing account checkbox controls whether the user is redirected to the Sign In page or the Registration page after clicking the Register button. If they already have an account, they go to the Sign In page; if they don’t, they go to the Register page.
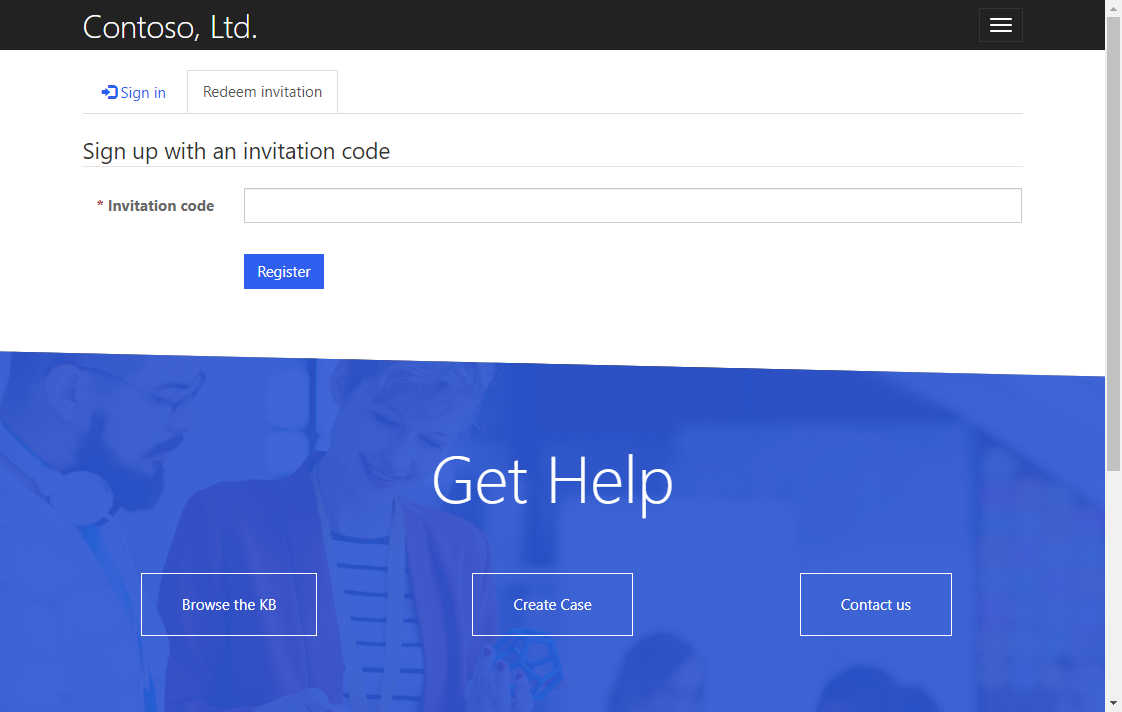
It’s important to note that if you’re using a single identity provider for your portal (like Azure AD B2C), the checkbox becomes completely useless, as the user ends up on the same page either way. In those cases, you’ll almost definitely want to hide the checkbox.
So unless you plan on sending invitation codes to users who can already log into your portal, users should always be leaving that checkbox unchecked. So why not hide it just to remove any confusion?
Hiding it is pretty easy – there is a checkbox class that is used for that element (and its label), so it’s as simple as the following CSS:
.checkbox {
     display: none;
}
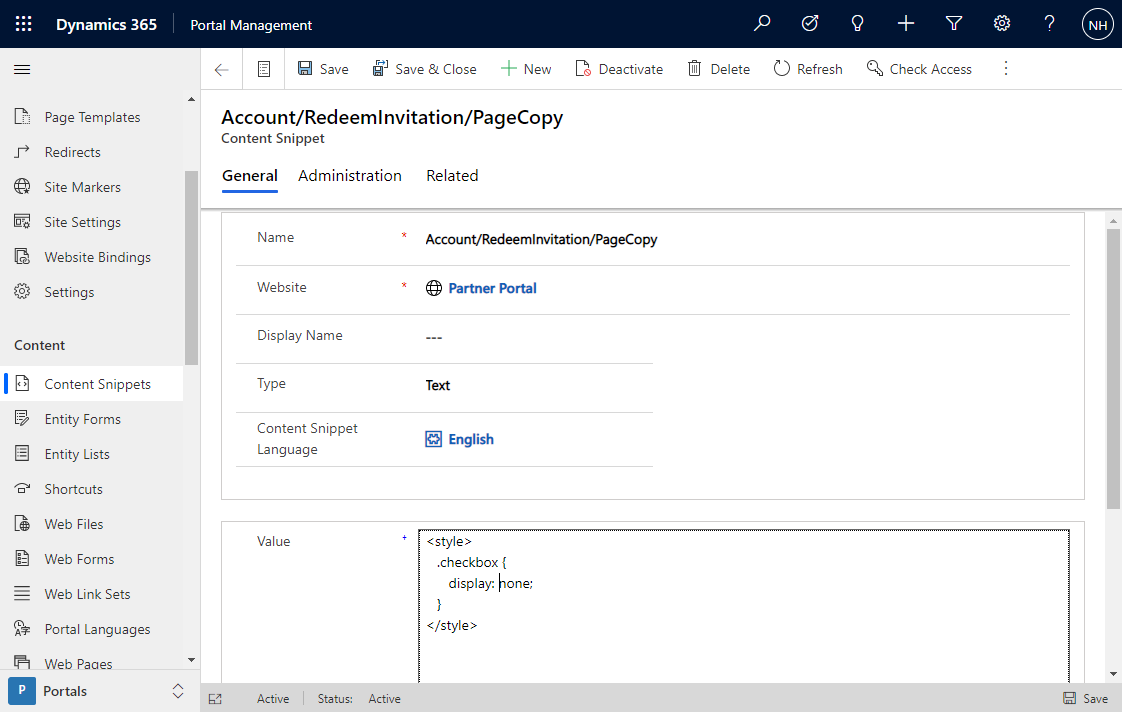
But where do you put that CSS? Sure, you could put it in a site-wide CSS file, or in the Footer or Header Web Template, but that may hide checkboxes elsewhere that you don’t realize. You’re better off only including that CSS on the Redeem Invitation Page.
But, even if you look really hard, you won’t find a Web Page for the Redeem Invitation page. The pages associated with login (like sign-in, registration, redeem invitation) don’t have Web Page rows – they are built directly in Microsoft’s portal code. So you can’t add it to the Custom CSS column of a Web Page.
What you can do is leverage the Content Snippet that Microsoft has included on the page to allow you to customize the text that appears on the page above the form. That Content Snippet has a name of Account/RedeemInvitation/PageCopy. Keeping in mind that this Content Snippet is meant for any HTML, so you need to wrap your CSS in <style> tags, to get the desired effect like so:
If you visit the Redeem Invitation page as an administrator, you’ll see that you can front-side edit the Content Snippet as well, but I’d avoid doing that at it strips out your <style> tags. You’re best off making these changes via the Portal Management app.
Don’t forget to clear the cache after making those changes!

[…] post Power Apps Portals: Hide the Existing Account Checkbox on the Redeem Invitation Page appeared first on Engineered […]
You might not find the snipnet Account/RedeemInvitation/PageCopy in your portal.
In this case, simply create it
Another useful snipnet : Account/Register/PageCopy
great article! really appreciated
thank you
Is the invitation feature necessary if the user can login with external login providers, as portal automatically creates contact? I don’t see any association between login credentials and contact with or without invitation code feature. Please elaborate, I’m new to portals. I have an app where user can login with Open ID provider. Do I need Invitation feature?
The invitation code is necessary if you have existing contact records that you want to join with a login.
If everyone gets a new contact, then you don’t need the invitation code process.
Thank you so much for this great tip
Hi,
where/how did you find out which Content Snippet was?
Account/RedeemInvitation/PageCopy
https://www.engineeredcode.com/blog/dynamics-365-portal-undocumented-settings-and-snippets