
 Hourly Consulting
 Maintenance
 Training
 Implementation
 Microsoft Power Pages
 D365 & Power Platform
 Websites & Web Applications
 Blog
Blog
 Power Pages Tips
 Portals Community Call
Dynamics 365 Portal: Customizing Portal User Registration Process – Part 4
In my last post in this series on creating a custom registration form for a Dynamics 365 Portal implementation, I discuss some optional minor user experience enhancements.
In my previous post I completed the process for creating a custom user registration form. However, with a bit more effort, it is possible to enhance the user experience for anyone going through this process.
Cleaning up the Invitation Email
As I mentioned in my last post, it is important to customize the email that appears in the Send Invitation workflow, including:
- Updating the From address to ensure that the email will actually be sent.
- Updating the body of the email to ensure it is both on-message and on-brand for your organization.
- Updating the link in the body of the email to ensure that it points to your Portal.
Customizing the Invitation Code Redemption Screens
Because we’re using the invitation code model for something a bit different, some of the out-of-the-box language on the screen when redeeming might be a bit confusing for users. If you only plan on using invitation code for this registration process, you could update the language to be very specific – otherwise maybe make it a bit more generic. Some of the elements you may want to customize include:
- Authentication/Registration/OpenRegistrationEnabled Site Setting: setting this to false will hide the out-of-the-box registration so that you don’t confuse users (but will still allow users to use invitation codes).
- Account/Redeem/InvitationCodeFormHeading Content Snippet: this is the header that appears above the invitation code form – you could set this to Confirm your code to setup your credentials.
- Account/Redeem/InvitationCodeFormButtonText Content Snippet: controls the text of the button on the first invitation code page – you could set this to Confirm.
- Account/RedeemInvitation/PageCopy Content Snippet: this can be used to add language to invitation code page. In our case, we’ll use it to add some CSS to hide the check box that asks if they have an existing account (which they shouldn’t), and the subnavigation that includes a link to the sign in page, which I feel will just confuse users:
<style type="text/css"> .page-content .checkbox, .nav-account { display: none; } </style> - Account/Register/PageCopy Content Snippet: this can be used to add language to page where the user selects their authentication type. In our case, we’ll use it to add some CSS to hide the subnavigation that includes a link to the sign in page, which I feel will just confuse users:
<style type="text/css">
.nav-account {
    display: none;
}
</style>
Remember that if any of these settings or snippets don’t already exist in your environment, simply create them with the appropriate name. After making these changes, users will see a screen like this when clicking the link from their email:
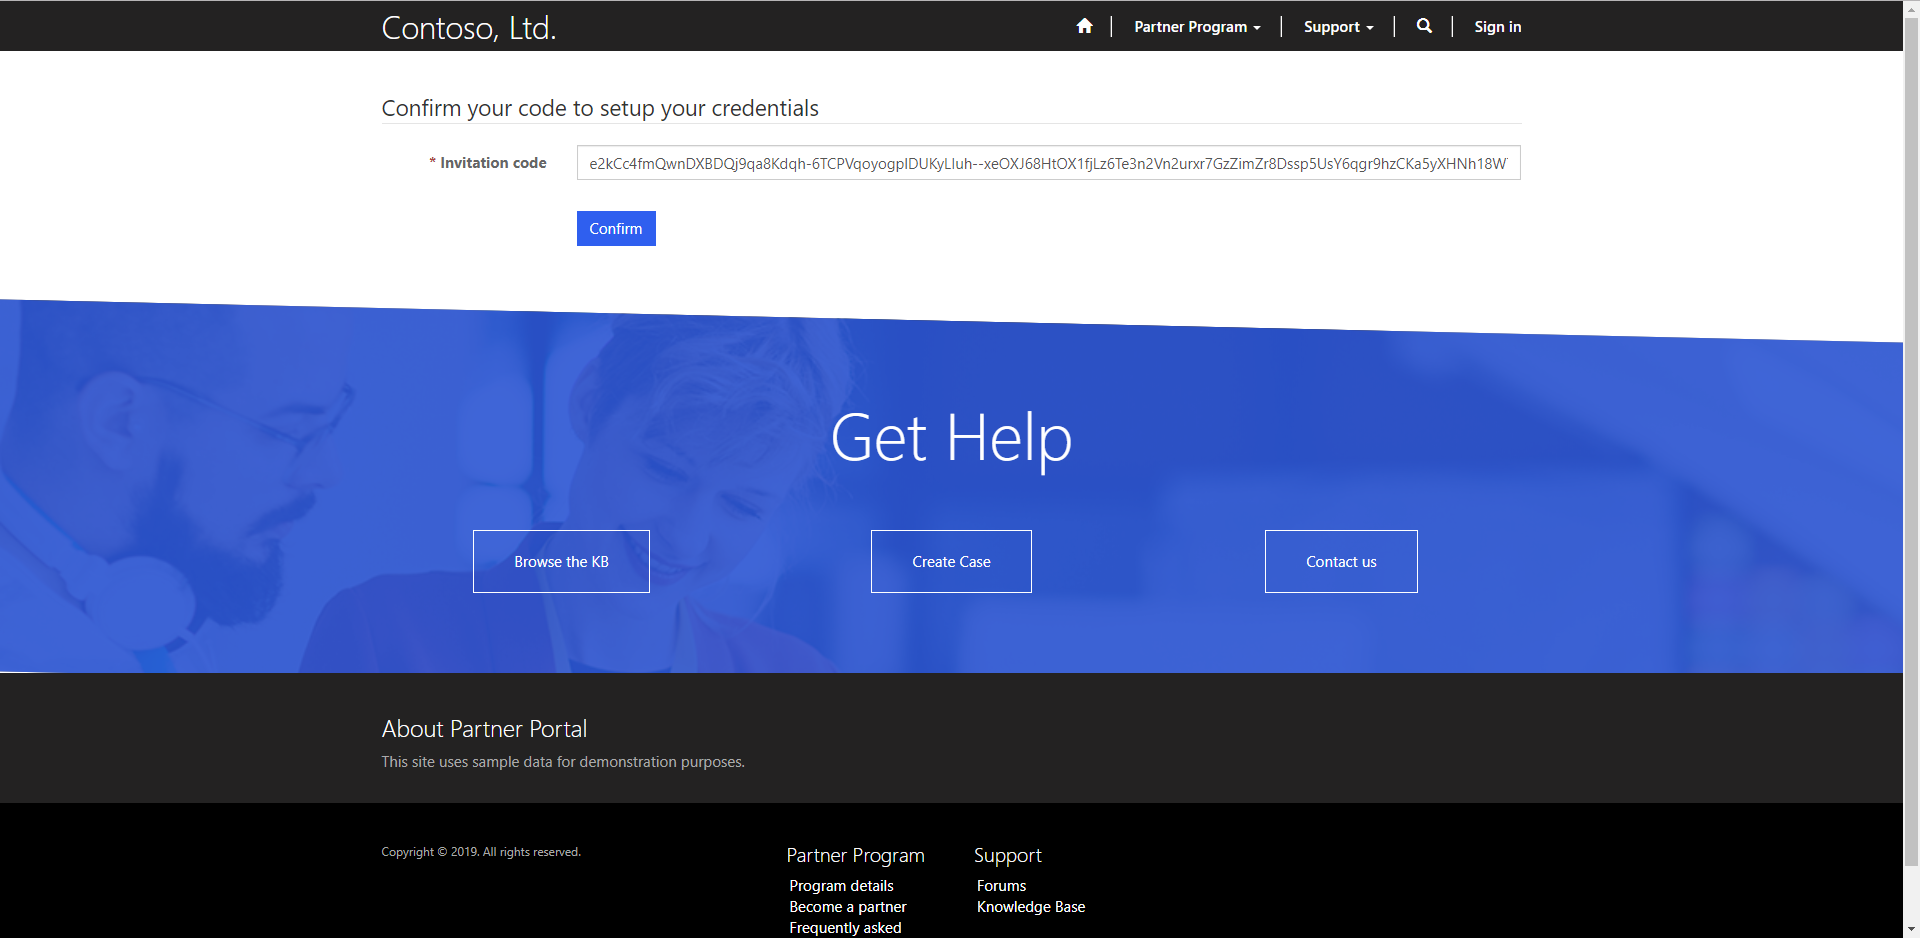
This is a more streamlined version that I think will lead to less confusion.
That brings to a close this series of posts – I hope you found them helpful. As I mentioned, the user registration process is an area that usually generates a lot of questions, so if you have another approach you’ve used successfully, please share with the community!


“In our case, we’ll use it to add some CSS to hide the check box that asks if they have an existing account (which they shouldn’t),”
Hi Nicholas,
Hope you are well. I wonder if you could help me.
What does the checkbox “I have an existing contact” do?
Thank you very much in advance!
Olena
Hi Olena,
This allows a user to sign in with an existing account, as opposed to creating a new one. This is useful in rare cases when the invitation code model is used give existing users additional web roles (as opposed to using it to invite new people to the portal).
Nick
Hi Nick,
Thank you very much for the quick response.
I still have some questions left but it’s good enough for our testers 🙂
Thank you very much!
Olena
Hi Nick,
I am running into a Problem while redeeming invitation ; it always says The user name “xxx” is already taken.
Although there is no contact in the system with this email as duplicate.
Can you please highlight to me what i might be missing?
Appreciate your Help
Are you using email address or username for authentication? Perhaps a user has taken the username using that email address, but their email address field is different.
Hello Nicholas!!
I’m tring to modify my login page, using the modification from code snippet ‘Account/Register/PageCopy’
I created this snippet in my portal, is HTML type, and I’m creating a JqueryFunction. This is the code:
$(window).load(function () {
$(“.nav.nav-tabs.nav-account”).hide();
});
Now i’m trying using the same CSS code that you have:
.nav-account {
display: none;
}
I save the changes and reset the caché, but i don’t see the changes, for any option. Where is the problem?
Thanks in advance,
The first thing I’d check is if your code is making it onto the page. If you view the source of the page, can you find it there?
Nick
Hey Nicholas,
I always find your tutorials really helpful! Thanks for these!
For this totorial I have a question in regards to the authentication. I followed your instructions but I missed somehow how the user sets his password initially. Once the user entered his invitation code, the next step is the out of the box “register for new local account” where he should enter email, username, password, and password approval. But onced he entered the data it always produces the messag “invalid invitation code”
When I follw the standard process it works fine. What di I miss?
Thanks for your help in advance
Regards
Dietmar
Just to confirm, the user enters an invitation code, they are then able to proceed to the next step (which should mean the invitation code is valid), and then when they try to create their username/password, it tells them at that point they have an invalid invitation code?
Nick
This is really insightful, is it possible to take it one step further with external identity providers?
IE Auth0 when a person is using the redemtion code, and neet to pass something to Auth0 so i can pick that ip, and hide the Login Tag, and only displat the Register Tab.
Auth0 allot me to do that, but I need to be able to pass something to Auth0 so it know whhich way to make the decision of is login, on register is hidden.
Any ideas?
Hmm, that’s an interesting question. What about having two different identity providers, one for with redemption code, and one without? They would of course be the same identity provider under the hood, just two different versions (in Azure AD B2C terminology, two different sign up/sign in policies). Haven’t tried it myself – may not work, but might be worth a try.
Nick
Hi Nicholas,
This is quite interesting & something that we are looking for currently! Thanks for sharing.
Question, is it possible to not use the Contact’s primary email address field, but instead a custom email field for portal logins?
If you use an external identity provider, like Azure AD B2C, you can setup whatever username you want (including a different email address), and have it tied to the contact.
Nick
Thanks Nick,
Is there a different process for Azure B2C connected Contacts? None of the listed Content Snippets exist in newly configured portals.
Hey Glenn,
It would be the same for B2C. If content snippets don’t already exist, you just need to create them yourself with the correct name, and then the portal will find them.
Nick
Thanks Nick,
A large number of our users found the checkbox & Invite code too challenging, so also added some javascript to hide the invite code and give some pointers for the next screen.
—————————————————–
$(document).on(‘ready’, function () {
try {
$(“#InvitationCode”).hide();
$(“#submit-redeem-invitation”).before(“Click on the Portal Registration button below. On the next page, click the Sign up now link in the bottom left of screen.”);
$(‘label[for=”InvitationCode”]’).text(‘Portal Registration’);
$(‘label[for=”InvitationCode”]’).removeClass(‘required’);
}
catch (error) {
}
});
.page-content .checkbox, .nav-account {
display: none;
}
I am trying to do confirm the email id of external sign in using an OTP verification. Is there a way to do that or something similar to that which will confirm the email id, but it shouldn’t be an invitation.
Do you want the OTP every time the user logs in? Or just to confirm the email address?
If every time, that would need to be a feature of your identity provider, not the portal.
If one time, check out this post from Robert Bailey – it might point you in the right direction.
https://robert-bailey.blog/2020/08/24/how-to-enforce-confirmation-of-email-before-enabling-portal-functionality/
Nick